Advertisement

Sunday, August 22, 2010

Managing Content With Section and Category


In this section, I will explain about manage section and category related with writing article management section.  I think I should explain it directly. These are the steps :
1.    Find the “section Manager “ button.
2.    If you have found it then click it. It will show a new window like this 
3.    Find the “New” button with plus sign in the bottom right corner.

4.    Click the “New” button and then it will show a page like this.

5.    Fill the tab with your own desire. For example, I filled the title and alias by “First Section”. And I choose “published” button so that my section can be published.

6.    Fill the other requirement too

7.    Type any sentence on description or you just leave it like that. It’s all up to you!

8.    After all tab have been filled, just click the apply button or save button.

9.    Now we will manage ‘category’. The first step that you have to do is go to Category Manager. Find the “Category Manager” button then click it. It will show a new page like shown in the figure below.

10.  Find the “new” button on the top right corner page. Then click it. It will show the page like figure below.

11. Fill the details tab. The name of new category is up to you. For example, I create “Culture” category.

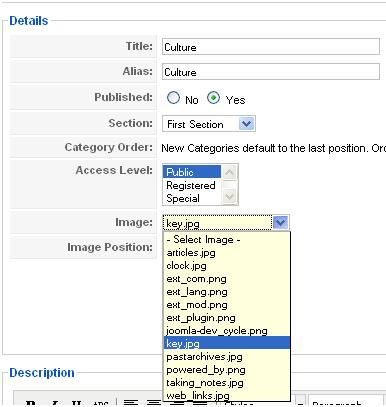
12. Then type the description by your own words or just leave it like that.

13.  After all click the save button on the right corner. Then your new category was successfully saved.

14. I have made three categories of it. First is culture, then Education and Entertainment. So I have three categories now.

Friday, August 13, 2010

Changing Joomla!1.5.12 default template

In this section, I will teach you about how to change very standart Joomla! Template. There are many step of it, but I will explain it clearly so you will understand. These are the following steps :
1.Login first to your homepage. With user name Admin and your own password.

2.Then go to Extension manager like shown at

3.After that click the install/uninstall button. It will go to new page like shown in the figure. Press “browse” button, then choose your template in format .zip and press open. Last, click “upload file & install” button.

4.Next step is, go to the template manager

5.Click template manager button like shown in the figure. Then click the template that you have been installed (exactly on it’s circle button. Then click “default” button.

6.If you want to know the result, please click “preview” button.

Installing Joomla!1.5.12


For installing Joomla! 1.5.12 on your computer, then the steps you can do are below :
  1. If you do not have the installation files Joomla then you can download it at www.joomla.org first for free. If you had had the installation file, just put it directly on its destination folder(htdocs folder inside xampp folder). For example C:\xampp\htdocs (should be put in the form of *. rar / *. zip first). Open xampp folder, and find htdocs folder.
  1. After you put the installation file, then do the extraction in the same directory. Click right side on your mouse, and click Extract files.

  1. To make a different name with an existing file name, rename files in order to make easy for you when the installation process begin. For example, I rename the files with my own name.

  1. After that, open the file by typing localhost / filename in the address bar of your web browser(Mozilla firefox). For example http://localhost/fortunela , after you type then press Enter. It will automatically display installation such as the following, which led to a folder in directory http://localhost/fortunela/installation/index.php.

  1. In this page, you can choose your preferable language. If you just want to select English, then press Next button. It will display the next page. Just click Next button again.

  1. The next page is license page. In order to not to wasting time, just click Next button again.

  1. After that you will see the database configuration page. In this moment you have to configure your database with Joomla!. Fill the Host Name menu tab with “localhost”, and Username menu tab with “root”, and Database Name with your own database name(ex. Fortunela). Just leave the password tab menu.

  1. Then the system will show a FTP Configuration that allows you to configure it. Just leave it like that, just press the Next button.

  1. After you see a FTP Configuration, you will see the Main Configuration for your website. Fill the Site Name tab, E-Mail tab, Admin Password, and confirm it. Do not fill another tab, because it’s only for advance user. Then click “install sample data”. After that, the button will changed into “sample data installed successfully”. Then press Next button.

  1. After this step, go to your xampp installation directory. Go to C:/, then open xampp folder, find the installation folder. Just delete or rename it.

  1. Now, your installation is completed. Congratulation!

Creating Database


Before the installation of Joomla! 1.5.12 of your computer start, you must create a database first. The steps will explain below :
  1. This is the first step of creating database. Click phpMyAdmin on XAMPP for Windows’ page. 


  2. After phpMyAdmin can be opened, then the display appears like the figure below. To create a database, you can directly enter the database name that you want on the menu tab. As example, I use my own name as a database name.


  1. After you have successfully created a database, the system will display a confirmation as figure below


  1. Up to this step, the process was completed.


    Read the next tutorial "Installing Joomla!1.5.12"

Running XAMPP

Usually after your XAMPP already installed on the computer, the services available on XAMPP such as Apache HTTP server and the other will run automatically. If not run automatically you can perform the following explanation :

1.Find the xampp installation shortcut on your computer desktop. Then click twice to that icon. 

2.After double click, it will show xampp menu tab setting. Click start on apache and MySQL choice.


3.The next step is open your web browser(usually Mozilla Firefox). Then type localhost/xampp in its address bar. It will show http://localhost/xampp/splash.php 

4.Then will appear the core pages of XAMPP for Windows. Up to this stage the XAMPP installation process was completed.
 Next step ---> Creating Database

Installing XAMPP


  1. First, you have to have the installation files. Don’t be worried, just download it at www.apachefriends.org or www.sourceforge.net/projects/xampp/.
  2. When finished downloading the installation files, now we will start the installation. Click twice on file named xampp-win32-1.7.2


  1. There will be a first window of installation. Destination folder will go to C:\ automatically. Just leave it like that and then click Install button.extracting files may take several seconds. 


  2. After that will come to the resemble look of cmd.exe is used to configure the installation. The first will be asked to confirm the problem laying XAMPP Control Panel shortcuts on the desktop (yes / no question) just press enter         


  1. After that, it will appear a new window like those, but don’t press enter, just press X letter.

Next step is Running XAMPP
Please read next tutorial "Running XAMPP"